How Do I Inspect And Replace My Land Rover Defender Brakes?
Important Disclaimer: This article serves as a general guide only. For detailed instructions specific to your vehicle, always consult your Defender's official maintenance handbook or seek professional advice from a qualified mechanic. Brake systems are critical safety components, and incorrect installation or maintenance can result in brake failure and serious injury.
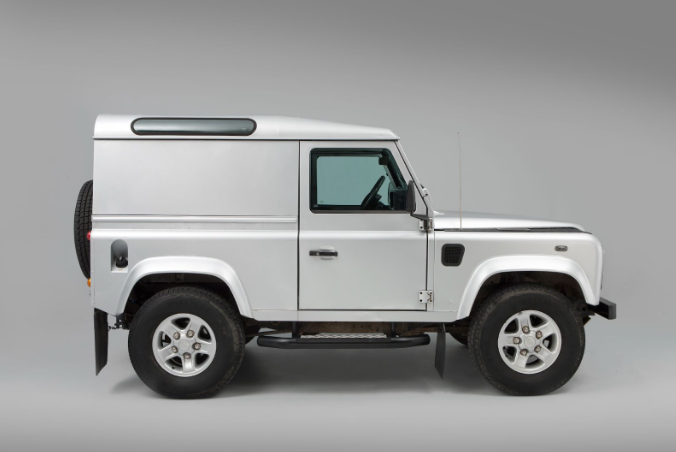
Your Defender's braking system is arguably its most critical safety component, whether you're navigating country lanes or tackling challenging terrain. From the early Defender models to the later Puma model, understanding how to inspect and replace your brake pads properly ensures both safety and optimal performance. This comprehensive guide walks you through everything you need to know about maintaining your Defender's brakes.
What are the warning signs that your Defender needs brake attention?
Several telltale signs indicate your Defender's brakes need inspection. Squealing or grinding noises when braking are the most obvious warnings. That metal-on-metal sound means your pads are worn to the backing plate, potentially damaging your discs. You might also notice increased stopping distances, a spongy brake pedal feel, or the vehicle pulling to one side when braking.
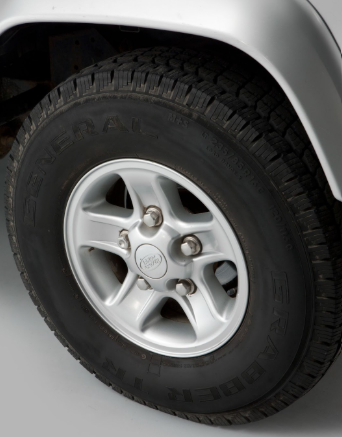
Visual inspection reveals other clues. Look through your wheel spokes to check pad thickness - most pads should be at least 3mm thick. If you see deep grooves or scoring on your brake discs, or notice brake dust accumulation that seems excessive, it's time for a closer look. The brake warning light on your dashboard obviously demands immediate attention too.
Which tools and parts do you need for brake pad replacement?
Before starting any brake work, gather the right equipment. You'll need a basic socket set including 13mm and 14mm bi-hex sockets for caliper and disc mounting bolts, plus standard 17mm sockets. A brake caliper wind-back tool, high-temperature brake grease (copper grease works well), and a reliable jack with axle stands are essential - never trust just a trolley jack for safety. Keep some cardboard handy to protect your driveway from brake fluid spills. An 11mm spanner is crucial for brake pipe connections, and if you're working on the front hubs, you'll need a 52mm socket for the lock nuts.
The specific parts you need depend entirely on your Defender's age and specification. Early Defenders from 1983-2006 use slightly different brake components compared to the later Puma models, whilst the current generation features entirely different systems. Check your Vehicle Identification Number (VIN) when ordering - many brake components are VIN-specific, particularly calipers and discs.
How do you properly inspect Defender brake pads and discs?
Start with a thorough visual inspection. Remove each wheel and examine the brake pads through the caliper. Look for uneven wear patterns, which might indicate sticking calipers or contaminated pads from oil or brake fluid leaks. Check that both inner and outer pads are wearing evenly - significant differences suggest a seized caliper slide or piston.
Brake discs need careful scrutiny too. Light scoring is normal, but deep grooves, cracks, or excessive rust indicate replacement is needed. Use your fingernail to gauge groove depth - if it catches, the disc is likely worn beyond its service limit. Check disc thickness with callipers against manufacturer specifications if you have them.
Don't forget the brake fluid condition. Fresh fluid is clear or light amber; contaminated fluid appears dark brown or black. If you can't remember when it was last changed, replace it during your brake service. Brake fluid absorbs moisture over time, reducing its effectiveness and potentially causing internal corrosion.
What's different about brake systems across Defender generations?
Understanding your Defender's brake system generation is crucial for proper maintenance. Early Defenders from 1983-2006 typically feature conventional brake systems with vacuum servo assistance. These models use either solid front discs (usually found on basic 90" variants) or vented discs, depending on specification and build date.
The complexity increases with later Puma Defenders from 2007-2016, which introduced improved brake systems with larger discs and more sophisticated ABS integration. These models generally offer better stopping power and more consistent brake feel compared to their predecessors.
Current generation Defenders represent a complete departure from traditional systems. The new models use an Integrated Power Brake system - an electro-mechanical, brake-by-wire setup that doesn't rely on vacuum assistance. This advanced system monitors brake circuit air content and requires diagnostic equipment for proper bleeding and calibration after work.
How do you replace brake pads on early Defender models?
Begin by ensuring your vehicle is on level ground with the handbrake applied and rear wheels chocked. Remove the front wheel and locate the brake caliper - it's usually secured by two bolts at the back. Before removing anything, push the brake pedal several times to ensure the pads are properly seated.
Using a 13mm bi-hex socket (these bolts have a distinctive double-hex head), remove the caliper bolts and carefully lift the caliper away from the disc. Support it with wire or a bungee cord to avoid straining the brake hose. On TD5 models, you'll first need to remove the pads by taking out the R-clips or split pins, removing both brake pins while holding the spring, then extracting the pads.
For TD5 Defenders specifically, there's an excellent visual guide available showing the complete process for Replacing the Front Brake Discs, Pads and Calipers on a Land Rover Defender TD5. This video demonstrates the specific techniques needed for these popular models, including proper caliper removal and the correct sequence for reassembly. As John Paul from Rimmer Bros demonstrates, these caliper bolts can become extremely tight and corroded, making quality sockets essential.
Clean the caliper thoroughly, paying special attention to the slide pins and dust boots. Check these components carefully - seized slides are a common cause of uneven pad wear. Before fitting new pads, you'll need to push the caliper piston back to accommodate the thicker new pads. Use a proper wind-back tool or large G-clamp, but work slowly to avoid forcing brake fluid back through the system too quickly. When reassembling, the caliper bolts should be torqued to 82 Newton meters.
What makes brake pad replacement different on Puma Defenders?
Later Defender models require slightly different approaches due to their more sophisticated brake systems. The basic removal process remains similar, but pay particular attention to any electronic brake sensors or wear indicators. These delicate components can be easily damaged if you're not careful.
The bleeding process on Puma models typically requires more attention due to the integrated ABS system. If you've opened the brake circuit at all, proper bleeding is essential to avoid spongy pedal feel and ensure the ABS functions correctly.
Working on rear brakes: Additional considerations
Rear brake replacement follows similar principles to front brake work, but with some important differences. The handbrake mechanism adds complexity, particularly on drum brake models found on some early Defenders. Even disc brake equipped models have integrated handbrake mechanisms that require careful attention during pad replacement.
On TD5 models, you'll need to disconnect the brake pipe at the caliper using an 11mm spanner. If previous copper pipes have been fitted, the nut may be seized and require pipe replacement. Remember to clamp the flexible brake hose first to minimize fluid loss. The rear caliper bolts use the same 13mm bi-hex socket as the fronts and should also be torqued to 82 Newton meters on reassembly.
When working on TD5 models, you'll find the rear brake job has its own unique challenges. The video guide for Replacing the Rear Discs, Pads and Calipers on a Land Rover Defender TD5 provides step-by-step instructions specific to these vehicles. The process includes removing the half shaft (five 17mm bolts), then the hub assembly by removing the centre nut that should be torqued to 210 Newton meters on reinstallation. As demonstrated in the video, the rear disc mounting bolts require a 14mm bi-hex socket and should be torqued to 72 Newton meters.
Remember that rear brakes typically wear slower than fronts due to weight transfer during braking, but they're equally important for vehicle stability and overall braking performance. Don't neglect them just because they're less accessible. When fitting new pads, apply copper grease to the metal backing where it contacts the caliper, and ensure the spring retainers and split pins are properly secured.
Why should you consider upgrading your Defender's brake system?
Standard Defender brakes are adequate for most driving conditions, but many owners find performance improvements worthwhile. Upgrading your braking system can provide better stopping power, improved pedal feel, and increased resistance to brake fade during demanding driving.
Big brake kits represent the most significant upgrade option. These systems typically include larger discs, multi-piston calipers, and high-performance pads designed to handle increased heat generation. For Defenders used in challenging conditions - whether that's heavy towing, fast road driving, or competitive events - the investment often proves worthwhile.
Even without a complete system upgrade, choosing quality brake components makes a noticeable difference. Premium pads offer better initial bite and more consistent performance across temperature ranges, whilst stainless steel brake lines provide firmer pedal feel compared to standard rubber hoses.
What maintenance keeps your brake system performing optimally?
Regular maintenance prevents most brake system problems before they become serious issues. Check your brake fluid level monthly and top up with the correct specification fluid if needed - never mix different types. Most Defenders use DOT 4 brake fluid, but always confirm the correct grade for your specific model.
Brake fluid replacement every two years maintains system performance and prevents internal corrosion. This seemingly simple service often gets overlooked, but contaminated brake fluid is responsible for many brake system failures. If you're not comfortable bleeding brakes yourself, this job is worth leaving to professionals. The Eezibleed system mentioned in both video guides offers a straightforward approach - simply pressurize the reservoir with a spare tire at 20 psi, open the bleed nipples, and wait for clear fluid without air bubbles.
Keep your brake system clean. Regular washing removes road salt and contaminants that accelerate corrosion, particularly important for chassis components and those distinctive bi-hex bolts that are prone to corrosion. Check brake pipes regularly for signs of corrosion or damage - replacement is straightforward but critical for safety. When working on TD5 models, always verify clearance between brake pipes and suspension components through full steering lock, as pipes can run close to spring hangers.
How do you ensure brake work meets safety standards?
Brake system work demands attention to detail because lives depend on the results. Never rush brake repairs, and if you're uncertain about any aspect of the work, seek professional help. Some tasks, particularly those involving bleeding complex systems or diagnosing electronic faults, require specialist equipment and knowledge.
It is always recommended to use genuine, OEM or high-quality aftermarket brake components. Cheaper brake pads might seem economical, but they often produce excessive dust, noise, or poor performance. Quality components from reputable suppliers, like Rimmer Bros, provide better value through improved performance and longevity.
Test your work thoroughly before normal driving. After any brake work, pump the pedal several times before moving the vehicle - it should feel firm and consistent. Take an initial test drive at low speeds in a safe area to ensure everything functions correctly before returning to normal use.
Remember that brake work affects your vehicle's most critical safety system. If you have any doubts about your abilities or the quality of your work, consult a qualified technician. Your family's safety isn't worth the risk of getting it wrong.
Whether you're maintaining a classic early model or servicing a later Puma Defender, understanding your brake system and following proper procedures ensures safe, reliable stopping power for years to come. With quality components and careful attention to detail, your Defender's brakes will serve you faithfully through whatever adventures lie ahead.
For expert guidance on brake components specific to your Defender, along with comprehensive maintenance advice for Land Rover enthusiasts, Rimmer Bros provides the expertise and quality components needed to keep your Land Rover performing at its best.