
Important Disclaimer: Whilst we take every care to ensure that our website and information herein is as accurate as possible, errors and omissions are excepted. Please tell us if you think something is wrong.
Bringing a Triumph Back to Life: The Ultimate Guide to Restoring Your Classic Car
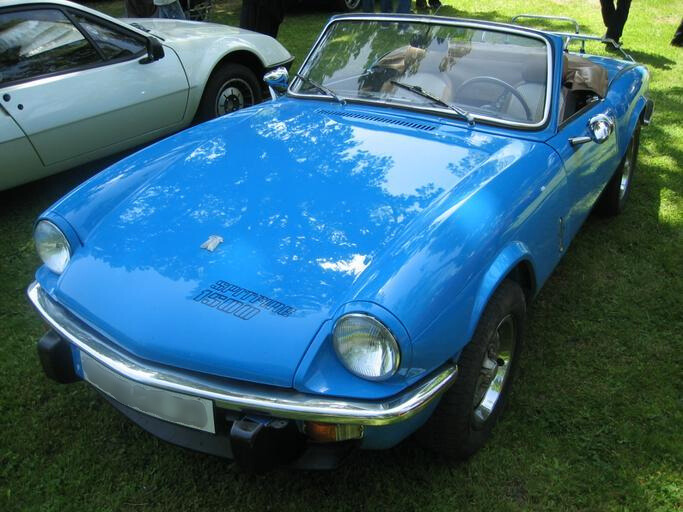
Restoring a classic Triumph is more than just a project - it’s a commitment to preserving British motoring history.
Whether you're reviving a Triumph Spitfire, TR6, Stag, GT6 or Herald, each model presents unique challenges and rewards. The key to a successful restoration is careful planning, sourcing quality Triumph parts and understanding the nuances of these legendary vehicles.
For classic car enthusiasts, the restoration journey can be just as rewarding as the final drive. This comprehensive guide will walk you through every step of restoring a Triumph, from assessing its condition to fine-tuning the engine and getting it back on the road.
Step 1: Evaluating Your Triumph’s Condition
Before you pick up a wrench, conduct a detailed assessment of your Triumph’s condition. This will help you determine whether you're facing a full rebuild or a more straightforward restoration.
- Bodywork & Chassis: Rust is the Achilles' heel of many Triumph models, particularly around the sills, wheel arches and floor pans. Scrutinise these areas, as extensive corrosion may require panel replacements.
- Engine & Transmission: Does the engine turn over? Are there signs of leaks or excessive wear? For optimal performance, a full Triumph engine rebuild kit may be necessary.
- Suspension & Brakes: Check the condition of Triumph suspension components, including bushings, shocks and control arms. Brakes should also be inspected for wear on discs, drums and hydraulic lines.
- Electrics & Wiring: Triumphs from the 1960s and ‘70s are notorious for electrical gremlins. If the existing setup is brittle or unreliable, a Triumph wiring harness replacement may be needed.
- Interior & Trim: A well-preserved Triumph interior is rare. Check for damaged seats, carpets and dashboard components that may need restoration or replacement.
Once the key problem areas are identified, create a restoration checklist and start sourcing genuine Triumph parts.
Step 2: Stripping the Car for Restoration
To achieve a professional-quality restoration, a complete teardown is often required. Carefully disassemble the vehicle, labelling and storing components methodically.
- Dismantle in Sections: Remove body panels, drivetrain, suspension and electrics in stages to avoid confusion.
- Take Photos: Document the process with detailed images to assist with reassembly.
- Organise & Label Parts: Store small components in labelled containers to avoid misplacing essential Triumph spares.
If there is extensive rust, consider media blasting or dipping the chassis to remove corrosion and provide a clean foundation for bodywork repairs.
Step 3: Restoring the Chassis & Bodywork
A solid chassis and body structure are crucial for the longevity of your Triumph. Depending on your model, you may need to:
- Replace Rusted Panels: Use high-quality Triumph body panels for a factory-correct fit.
- Strengthen the Chassis: Inspect the frame for cracks or weak points that require reinforcement.
- Paint Preparation: Strip old paint, apply rust treatment and use a Triumph colour-matched respray for authenticity.
At this stage, assess door alignments and panel gaps to ensure everything lines up before painting.
Step 4: Engine & Drivetrain Restoration
The heart of any Triumph is its engine. Whether you’re rebuilding a Triumph TR6 straight-six, Spitfire four-cylinder or Stag V8, restoring the powertrain is essential.
- Engine Rebuild: If the engine is seized or worn, use a Triumph engine rebuild kit, including new pistons, gaskets and timing chains.
- Fuel & Carburettor Tuning: Many Triumphs use SU or Stromberg carburettors, which may need refurbishing or replacing for optimal fuel delivery.
- Transmission Overhaul: Inspect the gearbox and differential, replacing worn-out bearings, seals and Triumph clutch components.
- Cooling System Upgrades: A new radiator, thermostat and hoses help prevent overheating - a common issue with classic Triumphs.
Once rebuilt, bench-test the engine before reinstalling it in the chassis.

Step 5: Suspension, Brakes & Steering
Restoring the suspension and brakes is critical to enjoying the dynamic handling Triumphs are known for.
- Suspension Overhaul: Replace worn Triumph shock absorbers, bushings and control arms for a smoother ride.
- Brake System Restoration: Install new discs, pads, drums and hydraulic lines to ensure reliable stopping power.
- Steering Refresh: Check for play in the steering rack, replacing tie rods and ball joints if necessary.
Modern suspension upgrades, such as polyurethane bushings and adjustable dampers, can improve ride quality while maintaining originality.
Step 6: Electrical & Wiring Restoration
Classic Triumphs often suffer from faulty wiring and outdated electrics.
- Install a New Wiring Loom: A Triumph wiring harness replacement eliminates electrical issues and improves reliability.
- Upgrade to Electronic Ignition: Switching from points-based ignition to an electronic distributor enhances performance and reduces maintenance.
- Lighting & Dashboard Fixes: Check all bulbs, fuses and switches to ensure everything functions correctly.
Modern LED lighting upgrades can provide better visibility while keeping the classic look intact.
Step 7: Interior Restoration & Reassembly
As the restoration nears completion, the Triumph interior needs attention.
- Seats & Upholstery: Use period-correct materials to maintain authenticity.
- Dashboard & Instrumentation: Restore or replace gauges, knobs and switches.
- Carpets & Trim: Install a Triumph carpet set and weather seals for a factory-fresh finish.
Once the interior is complete, finalise the reassembly by refitting panels, tuning the engine and adjusting mechanical components.
Step 8: Road Testing & Final Adjustments
Before declaring your Triumph restoration complete, thorough testing is required.
- Initial Start-Up Checks: Ensure proper ignition timing, fluid levels and engine performance.
- Short Test Drives: Gradually increase distances while monitoring for vibrations, noises or misalignments.
- Fine-Tune Suspension & Steering: Make final adjustments to alignments, camber settings and damper rates.
After successful road testing, your Triumph is again ready to hit the open road.
Restoring a Triumph requires patience, dedication and access to quality Triumph restoration parts. By following these steps and using genuine Triumph components, you can bring a classic British sports car back to life, ensuring it remains a joy to drive for years.
Frequently Asked Questions (FAQs)
What are the most common rust areas to check when buying a Triumph for restoration?
Focus on the sills, wheel arches, floor pans and chassis rails. These areas are notorious rust traps on all Triumph models. For Triumph TR6 models, the differential mounting points and rear trailing arm brackets must also be inspected. Early inspection can help you accurately budget for replacement panels and structural repairs.
How difficult is it to fix the electrical issues in classic Triumph cars?
Triumph electrical problems are manageable with methodical troubleshooting. Most issues stem from poor connections, degraded wiring or component failures. Installing a complete wiring harness replacement is often more cost-effective than repairing individual faults. Upgrading to an electronic ignition system and modern fuse box will significantly improve reliability.